
Summary -
In this topic, we described about the below sections -
Existing clients can be copied from local to remote system and vice versa. SAP has 3 client copy methods which are specified below -
- Local client copy -- to perform client copies inside same instance.
- Remote client copy -- to copy client between different SAP instances. Remote client copies the data immediately across the network using RFCs.
- Client export / import -- to perform client copies between different SAP instances.
Client copy tools copy the user’s data, cross client customizing, application data and client dependant customizing. The ABAP dictionary objects like ABAP reports, table definitions etc are not handled by the client copy tools and these objects can be transported through transport requests.
Pre-requisites Local Client Copy -
- Lock all the users using TCODE: SM04 (By single user) / SU10 (Mass users) or AL08.
- Suspend all background process with TCODE: SE38, enter "BTCTRNS1" and click the "execute button".
- For a local copy, the system must have enough space in the database or tablespace. Ex: using TCODE: DB02.
- rdisp/max_wprun_time parameter should be changed to greater than 1500 second as a SAP recommendation.
- To avoid inconsistencies during client copy users should not be allowed to work in source client.
Local Client Copy -
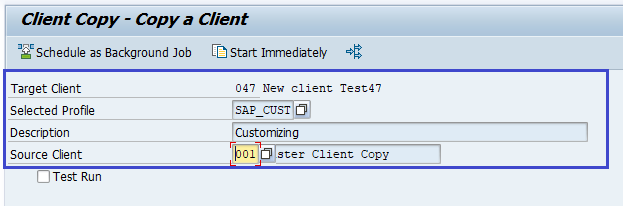
This procedure used to copy the client within the same instance. The transaction code used for local client copy is SCCL. Before we start copying, Create client with SCC4 transaction. In this case source client is 001 and target client is 047.
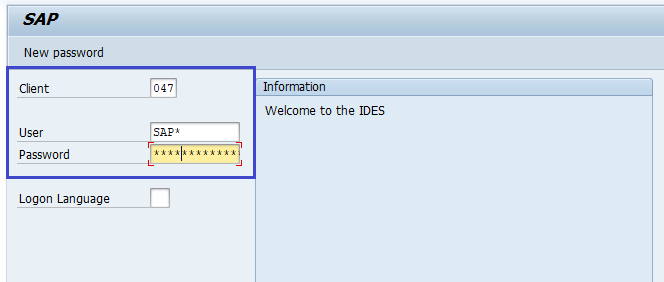
Step-1: Now login to 047 client with userid SAP*.
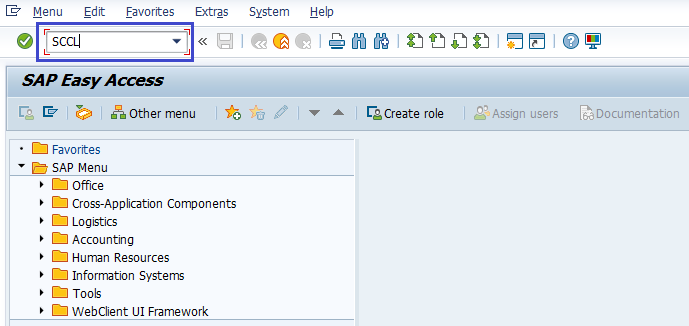
Step-2: Go to SCCL to open client copy screen.
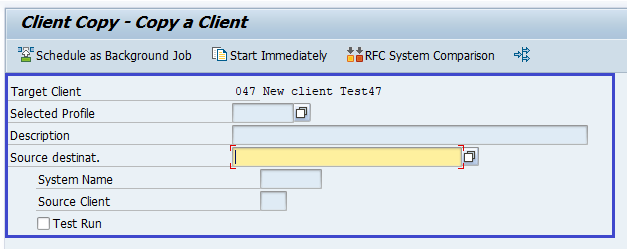
Step-3: Select the Desired Profile, source client which planning to copy from the list.
Step-4: If the job is submitted direclty, the client copy is executed in a single process. If user want to distribute the workload on multiple processes to reduce the copying time.
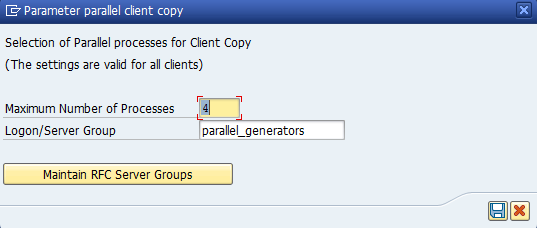
Step-5: Set the maximum number of processes in the below window and click on save.
Step-6: Click on Schedule as Background Job button as the background process takes more time.
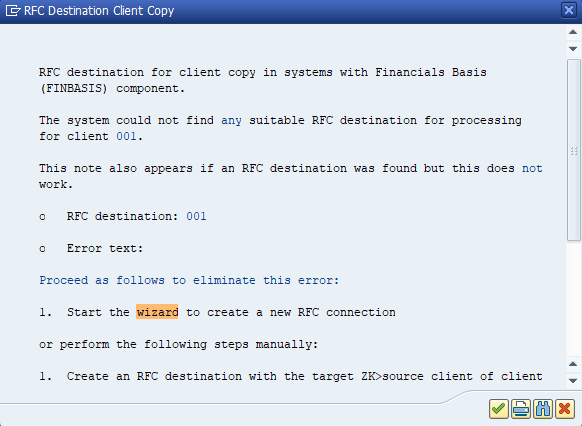
It shows the below warning. Click on Wizard to continue with the RFC setup.
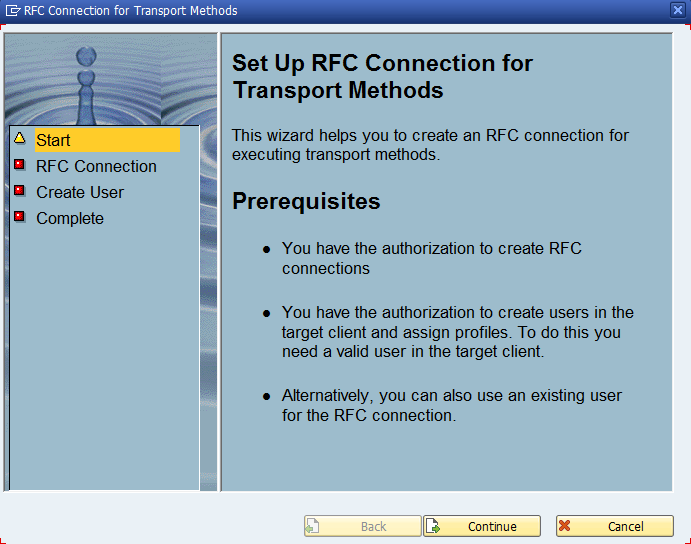
Click on Continue.
Select Destination server from the list and click on continue.

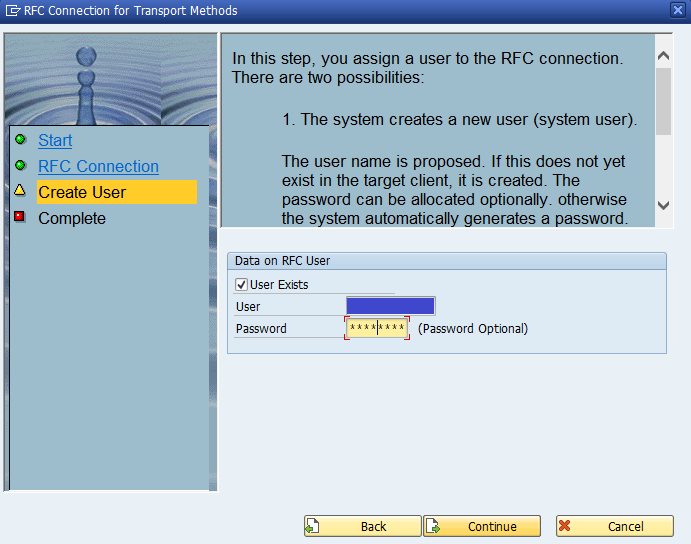
Enter the username and password for the RFC client and click on continue.
Click on Complete to end the setup.

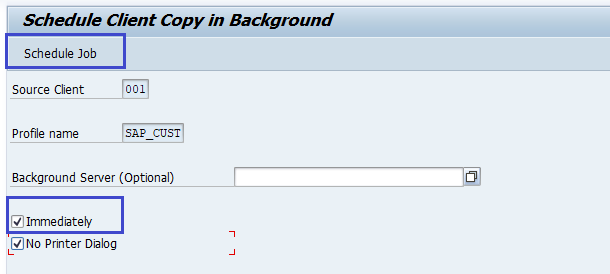
Click on Schedule background Job button once again and it navigates to the next schedule client background screen shown below.
Select the background server from the list if required and click on schedule job button.
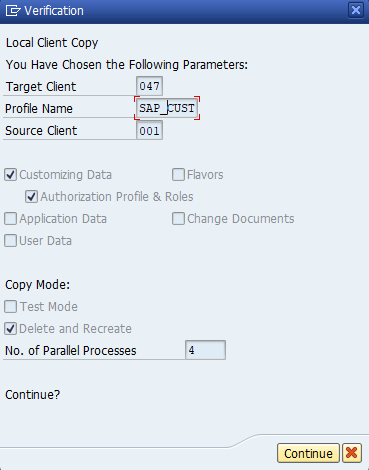
Step-7: Verify the information on the below dialog box and click on continue to schedule a job. Message will appear in the dialog box.
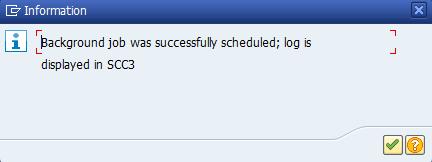
Step-8: Once the above message appears, Go to SCC3 transaction to monitor log.

Step-9: Click on the job processing to check the status of the job.
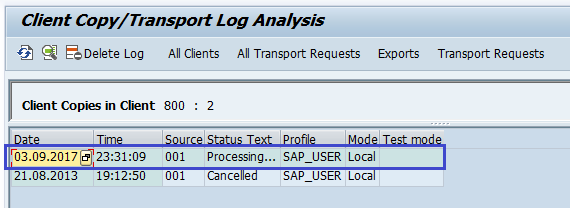
Step-10: The status shown like below.
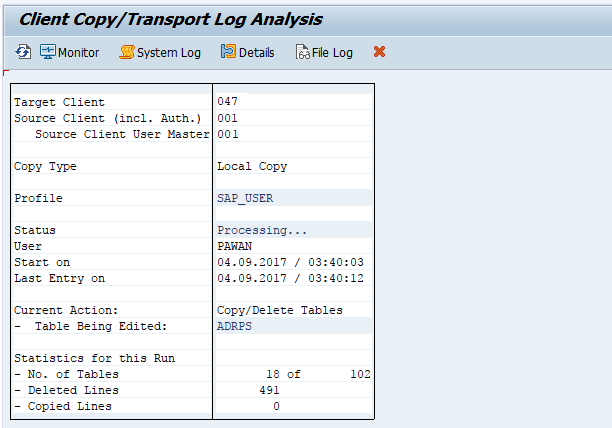
The client successfully copied once the job completed. The log will show complete information about the error if the job failed with an error.
Remote Client Copy -
This procedure used to copy the client between the different instance. The transaction code used for remote client copy is SCC9.
Step-1: Go to SCC9 to open client copy screen.

Step-2: Select the Desired Profile from the list, source destination(RFC system) to continue with copying.
Step-3: If the job is submitted direclty, the client copy is executed in a single process. If user want to distribute the workload on multiple processes to reduce the copying time.
Step-4: Set the maximum number of processes in the below window and click on save.
Step-5: Click on Schedule as Background Job button as the background process takes more time.
It shows the below warning. Click on Wizard to continue with the RFC setup.
Click on Continue.
Select Destination server from the list and click on continue.
Enter the username and password for the RFC client and click on continue.
Click on Complete to end the setup.
Click on Schedule background Job button once again and it navigates to the next schedule client background screen shown below.
Select the background server from the list if required and click on schedule job button.
Step-6: Verify the information on the below dialog box and click on continue to schedule a job. Message will appear in the dialog box.
Step-7: Once the above message appears, Go to SCC3 transaction to monitor log.
Step-8: Click on the job processing to check the status of the job.
Step-9: The status shown like below.
The client successfully copied once the job completed. The log will show complete information about the error if the job failed with an error.