
SAP BASIS Create User
As part of user’s administration, new user’s needs to be created in the SAP system. SU01 transaction code used for new user creation. Follow below steps to create different user types for different purposes.
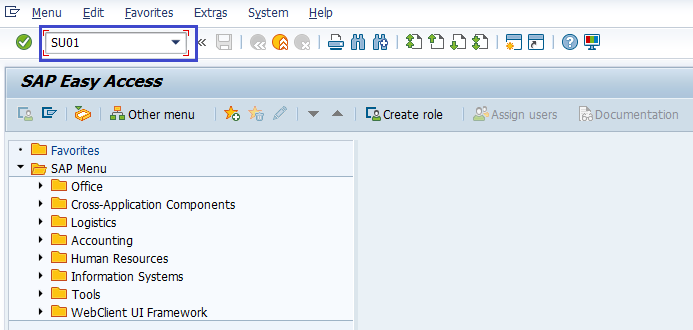
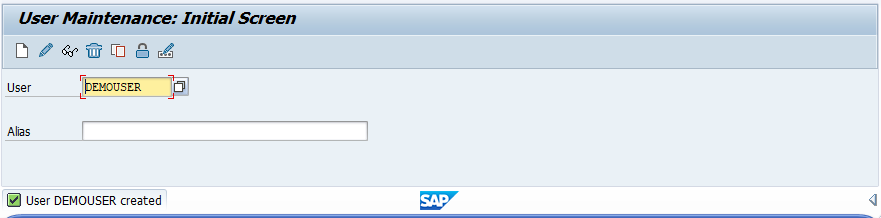
Step-1: Go to SU01.
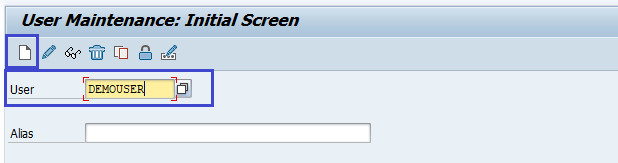
Step-2: Enter the username and click on Create icon to continue.
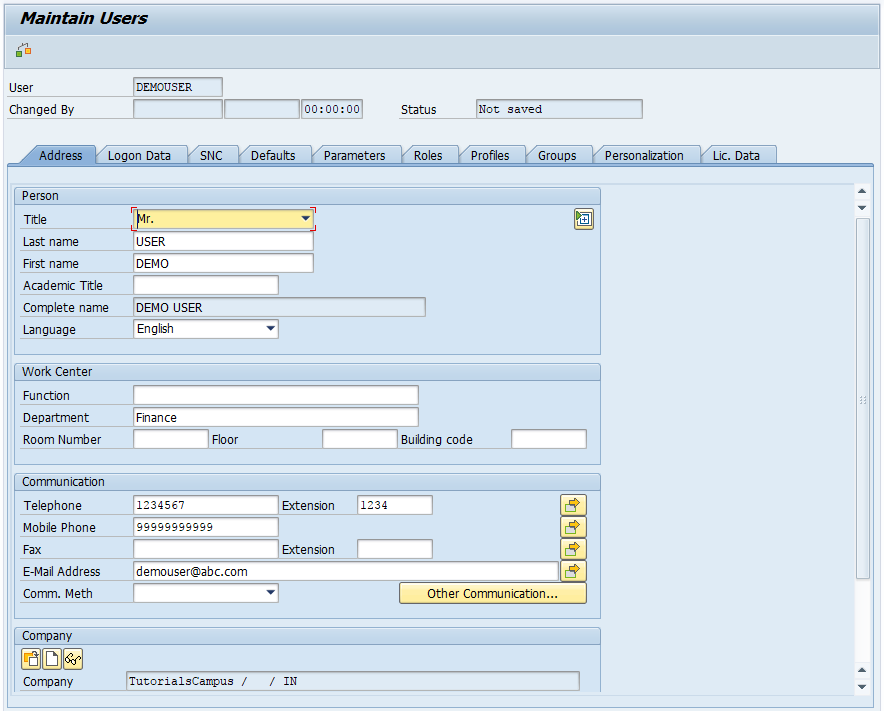
Step-3: It navigates to “maintain users” screen. Go to Address tab.
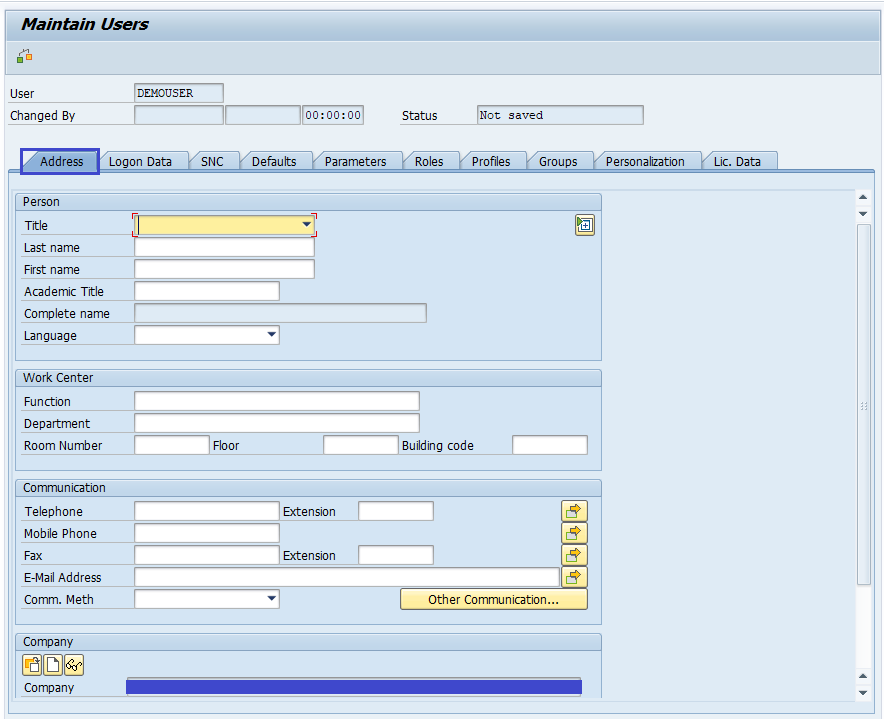
Fill the details like first name, last name, phone number, email id, etc.
Step-4: Move to “logon data” tab. Enter the Alias name and select user type from list.
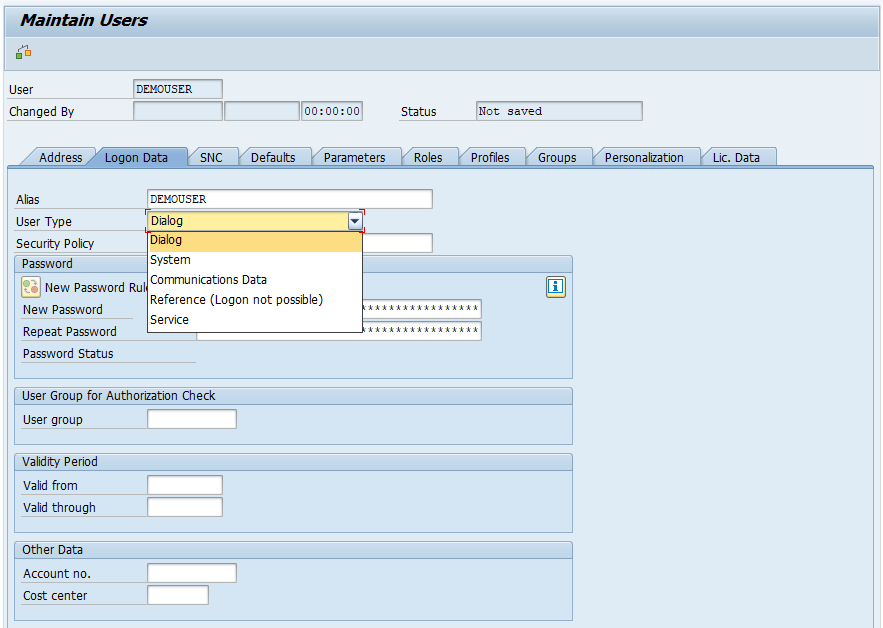
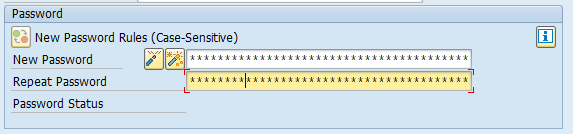
Setup initial password by entering new password and repeat password.
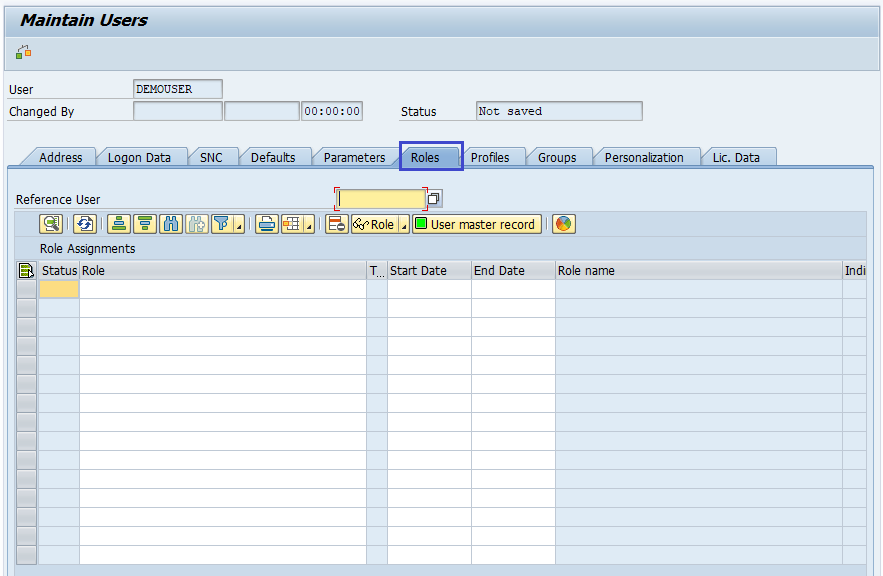
Step-5: Move to “Roles” tab and select the appropriate role based on the requirement.
Step-6: Move to “Profiles” tab and select the appropriate profile suits for the requirement.
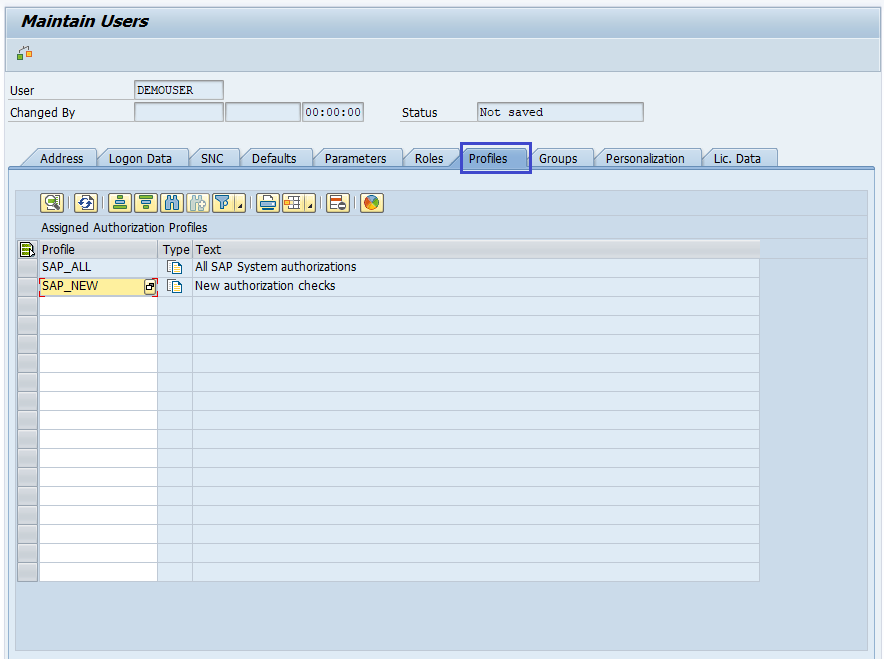
SAP_ALL: profile for the users to have all R/3 authorizations, including super-user authorization.
SAP_NEW: profile for the users to access all currently unprotected components and grants unrestricted access to all existing functions.
Step-7 : Click on save button to save the user and status bar displays the message “user DEMOUSER” created if user successfully created.
Status bar displays the error/warning messages if any occured during the process.